Authentic NY Pizza Recipe

Authentic NY Pizza Recipe

Reading next

Grilled Pizza on Steel: Problems and Solutions

Leave a comment

This site is protected by reCAPTCHA and the Google Privacy Policy and Terms of Service apply.

Summary

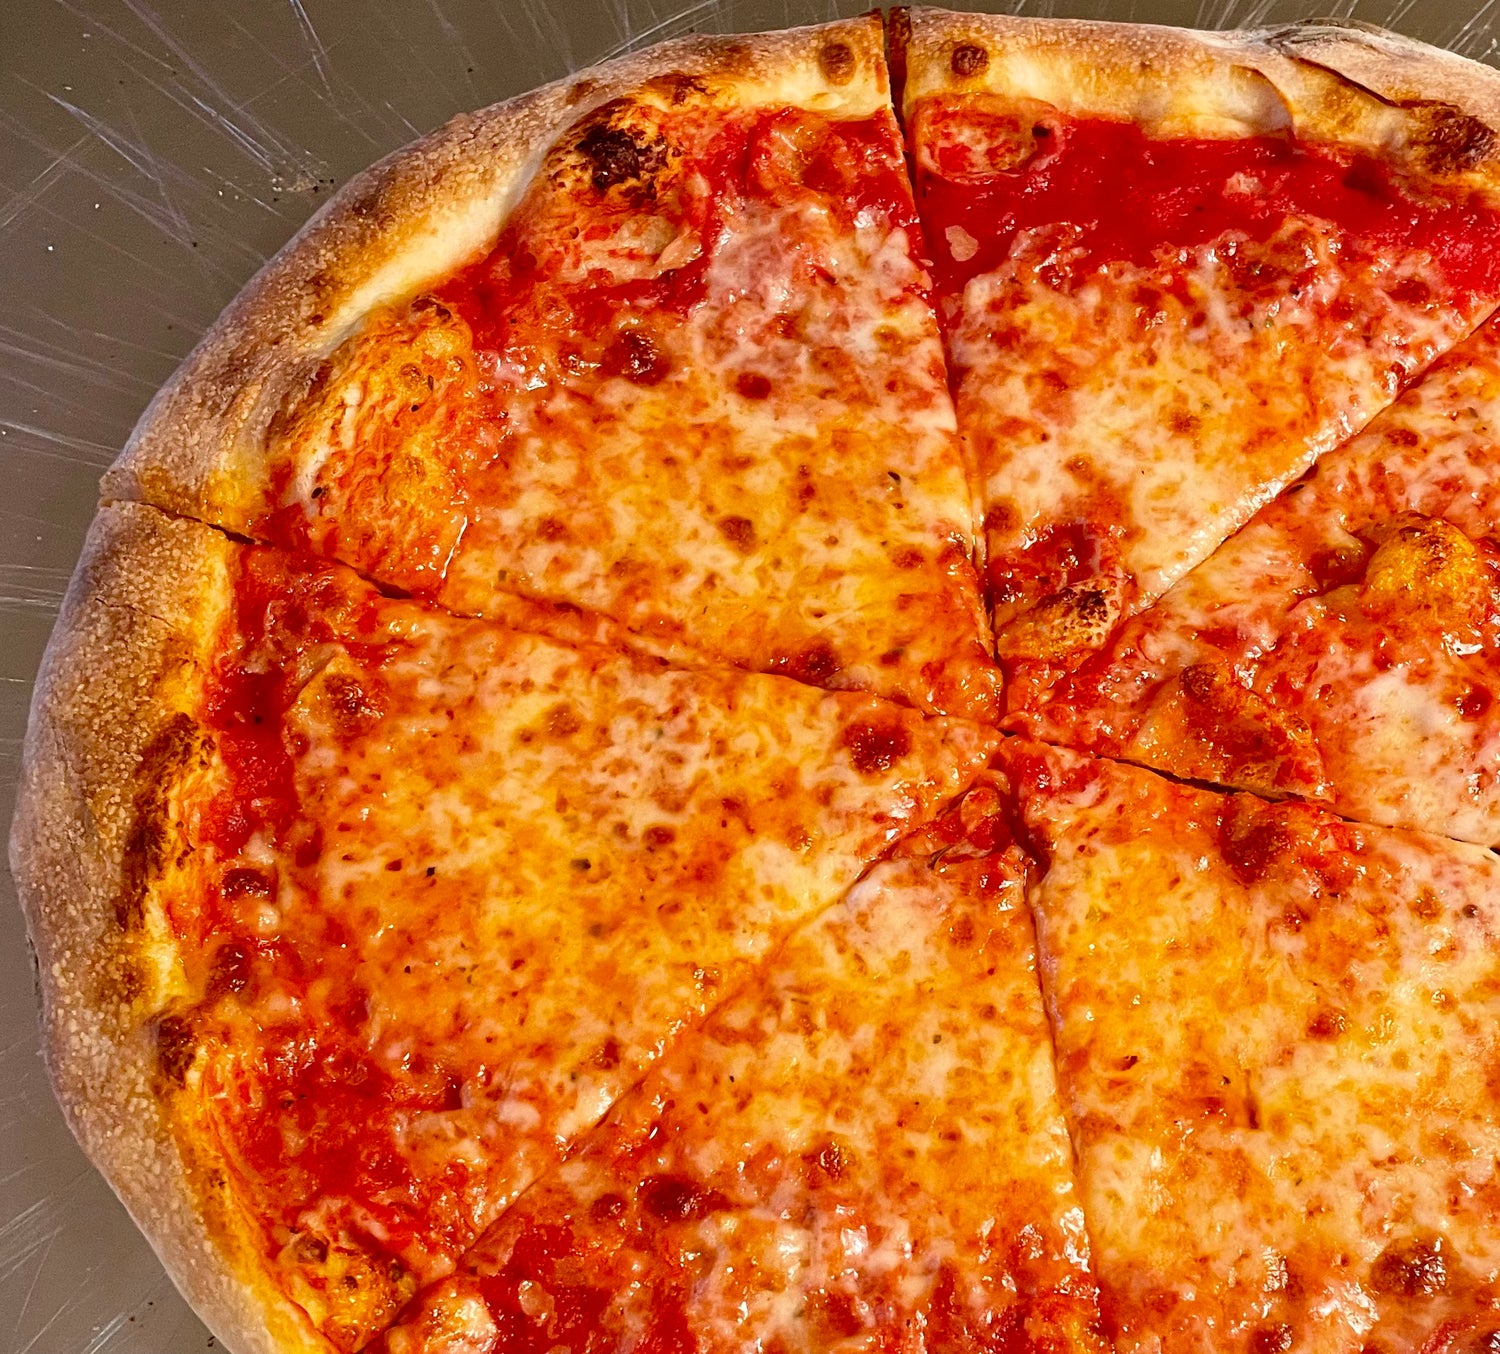
New York pizza is one of the most iconic foods in America. Loved and eaten by millions, it is staggering in its apparent simplicity while taking serious dedication to master.

An institution in and of itself, New York pizza is characterized by its crisp thin crust, slightly chewy rim, seasoned tomato sauce, and beautifully melted mozzarella.

This recipe was developed to create as authentic a New York pizza for your home oven as possible, reheated slices and all!

A trip to your local Restaurant Depot (they provide day passes for non-members) to acquire a 25lb bag of high protein flour (14.2%!), a 105oz. can of Stanislaus tomatoes, and a 6lb. loaf of professional grade whole milk low moisture mozzarella isn’t necessarily required, but for those yearning for a true New York slice, it’s worth the effort.

Otherwise, with an adjustment to your water amount (noted in the recipe below), your grocery store’s flour, canned tomatoes, and whole milk low moisture mozzarella can come together to give you a New York pizza experience that rivals any of your local pizzerias.

Ingredient List

Makes 4 dough balls approximately 355g in weight for 13”-14” diameter pizzas

Ingredient How much
Water 507g
High Protein Flour** 873g
Instant Dry Yeast 3g
Sugar 13g
Salt 26g
Olive oil 9g
Notes:

*Adjusted +0.75% to account for loss while mixing

**This recipe was developed using All Trumps 14.2% protein flour. If using All Purpose or Bread Flour, increase the water amount to 535 grams and mix in your stand mixer for 3 minutes after adding the salt. The dough will ferment at a slightly quicker rate - adjust proofing time at room temperature according to the activity you observe

Why Grams and not Cups/Spoons?

The weight of one cup of flour can vary up to 20 percent and this variance can completely change the intended final product.

Weighing your ingredients ensures that your dough comes out consistently each and every time and is the first step to making incredible pizza at home.

Recipe Overview

Mixing*:

  • Add lukewarm water (77F) to bowl of stand mixer
  • Add flour, IDY, sugar, and mix on low until fully combined, about 90 seconds
  • Add oil and mix on speed 2 until absorbed, about 1 minute
  • Add salt and continue mixing for 1 more minute
  • Turn dough out onto the counter and knead by hand for 1-2 minutes
  • Cover and bulk ferment for 30 minutes, performing one stretch and fold halfway through

*At this low of a hydration, hand mixing can be difficult. If you must hand mix, dissolve the yeast into the water, add the flour and sugar, mix until completely combined, mix in the oil, then fully mix in the salt. Cover and rest for 20 minutes, then proceed to steps 5 and 6

Ball:

  • Take out a container(s) large enough to hold the dough balls
  • Divide the dough into 4 equal dough balls by weight and shape into tight balls, being sure to pinch the bottom seam shut before placing in your container, seam side down, and cover
  • Proof for 1-2 hours at room temperature (68F-70F)
  • Place the container in your refrigerator and cold proof for 1-2 days
  • 3-4 hours before bake time, take the container with the dough balls out of the refrigerator and allow them to proof at room temperature. When it is time to shape they should be plump and pillowy, absent of any large bubbles

Preheat Oven:

  • If able, adjust your oven +10 degrees
  • Place steel in the middle of your oven
  • Preheat oven to 550F Convection Bake if possible, otherwise Bake will do
  • Once oven comes to temperature, allow to preheat for 1 hour

Edge Shape:

  • Fill a large bowl with flour (all purpose is fine)
  • Remove dough ball and place in the bowl with the flour
  • Using your finger tips, flatten the dough ball into the flour by gently poking it
  • Flip and do the same, keeping it a circle as best as you can
  • Flip once more, poke with your finger tips, pick the dough up, and pass it back and forth between your hands to shake off excess flour back into the bowl
  • Place the dough onto your lightly floured wooden peel or counter top
  • Using your fingers, carefully establish a rim around the perimeter of the dough by poking with your finger
  • Once your rim is established, poke from the middle out, avoiding the rim
  • Rotate 90 degrees and repeat a few times, pushing out from the middle while avoiding the rim and expanding the diameter of your dough
  • Pop any large bubbles that may appear in the rim, but don’t worry about smaller ones
  • Flip over and repeat steps 8-10 before flipping back over
  • On your pizza peel or counter top, with the outside of your dominant hand placed inside the rim of the dough and your non-dominant hand down on the lower half of the dough, stretch at the rim, pulling from the middle with your dominant hand while your non-dominant hand lightly applies pressure, holding the dough in place
  • Rotate slightly as you stretch. The dough should easily slide on top of the peel or countertop. If it sticks, add some flour underneath
  • After a few edge stretches your dough should be approximately 10 inches
  • Pick your dough up and pass it back and forth between your hands, keeping your hands as close to the edge of the dough as you can - this knocks off excess flour and stretches the dough some.
  • Using the first knuckles of your fingers and thumb, take the dough and stretch it from the edge, rotating/tossing as you go, being sure to stretch from the edge and letting the middle follow
  • When done properly, the middle to the inside rim of the dough should be an even thickness
  • When the dough is approximately 13-14 inches place it down onto a lightly floured wooden peel

Top

  • With a spoon or ladle, place approximately 110 grams of pizza sauce* in the middle of your dough and with the bottom of the spoon or ladle, evenly spread it over the dough in a circular motion, leaving about a half inch rim along the perimeter
  • With your hands, carefully spread approximately 95 grams of grated whole milk low moisture mozzarella over the sauce, working from around the edge and in.
  • Alternatively, place 5 to 6 thin slices of whole milk low moisture mozzarella over the sauce, being sure not to overlap, tearing the slices to fill in the gaps. The thin slices of mozzarella ensure an even layer of cheese and help to avoid grease spots that can happen from uneven clumps of grated cheese
  • Top with any other desired toppings

*A tip for knowing how much of an ingredient you are using:

Put the ingredient in its container on your scale and “tare” the scale. Now when you remove an amount of the ingredient, the scale will read “-75g” telling you you’ve removed 75 grams of the ingredient

Bake:

  • Launch pizza after the 1 hour preheat - target steel temperature should be approximately 595F
  • Immediately turn the broiler to Hi
  • After 1.5 minutes turn the oven back to Convection Bake
  • Remove the pizza with a metal peel after a 3.5 to 5 minute total bake depending on the capabilities of your oven and preference of doneness
  • Place pizza on a cooling rack for 1 minute, then cut either 1 large slice for yourself or 6 slices if you feel like sharing
  • Devour immediately or allow the slice(s) to cool for 20 minutes if you’d like to reheat for an authentic slice shop experience

Reheat (optional):

  • With your oven still at 550F convection bake, place your slice(s) on the steel
  • After a 30-60 seconds (keep your eye on it!), remove from the steel and place it on a cooling rack to cool slightly before enjoying

In-Depth Explainers

How to Edge Shape:
Top and Launch:
Entire Process, from Shaping to Baking:

A note on home ovens:

Home ovens, gas or electric, all behave differently. The best way to learn about your oven is to purchase an infrared thermometer and take the time to measure the temperature of your steel at different times during the preheating process.

Ideally you’d want to launch with a steel temperature of approximately 595F. Always keep an eye on your pizza and rotate if necessary to ensure even browning.

Developed by

Visit @rubofthekitchen on instagram

Robert Brown